


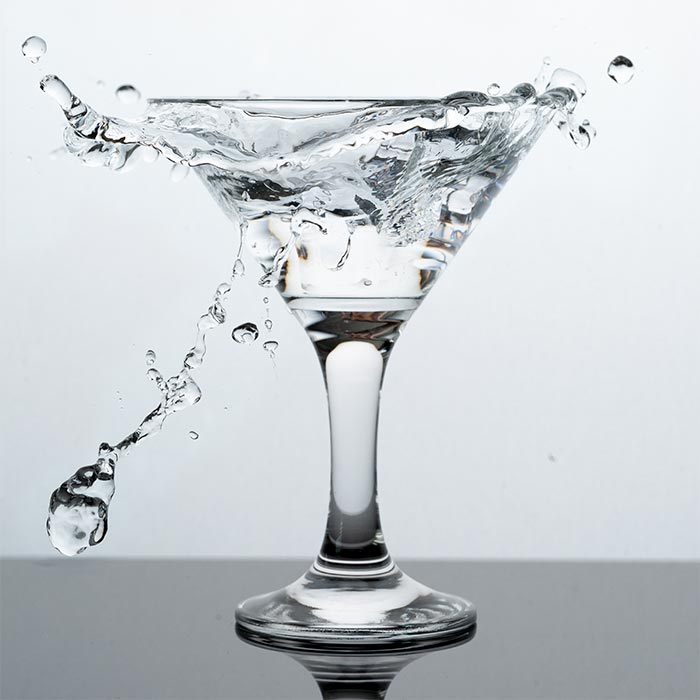

In this week’s post we’re going to be looking at how to create stunning food photography splash shots. Splashes and drips can look amazing when photographed, really adding energy and interest to food shots. But freezing fast motion can be tricky to do well if you don’t know how. This splash photography tutorial explains all.
Speed is King
As with capturing any fast-moving subject, the key to successful splash photography is using an exposure time short enough to totally freeze the action. Ideally something like 1/8000 of a second. However, although your camera may offer ultra-fast shutter speeds, unless you’re in a studio orbiting the sun, it’s unlikely you’ll ever have enough light to be able to shoot at so fast a setting.
Lighting for Splash Photography
Thankfully though, there’s a much easier way of achieving such a short exposure time: shooting with strobes. Whether speed lights or studio flash, strobes give out a concentrated amount of light in a very short space of time, meaning that even fast-moving subjects will be blur-free.
What’s more, when shooting with strobes, changing the shutter speed will not affect your exposure. Whether you shoot at 1/60 or leave your shutter open for several seconds, the exposure of the flash remains exactly the same. Just bear in mind, though, that if you go too low with the shutter speed, eventually the ambient light will start creeping into the shot, causing blur.
Here we’re primarily interested in capturing tack-sharp splash droplets, without any blur. However, in some cases a photographer may actually want to balance their flash with the daylight so as to deliberately cause a flash-blur effect. If you do want to experiment with this, be sure to set your camera to fire the flash at the end of the exposure rather than the beginning (sometimes called “end curtain sync”). This way the liquid droplets will be frozen sharp by the flash at the front of their direction of travel, and behind them will be a blurred tail caused by the ambient light.
Personally though, I don’t want any ambient light causing blur in my shot at all, so I’ve set my camera at its maximum flash sync speed: 1/250. This allows me to work in a reasonably well-lit room, without the risk of the ambient light showing up in the shot.
A word of caution: maximum flash-sync speed varies between cameras, so be sure to find out the maximum setting for your model. If you go beyond your camera’s highest sync speed, you’ll find that your photos start to display a black band across them. This is caused by the shutter starting to close before the flash has had time to fire, leaving a part of the sensor unexposed to the light. This effect will become more and more noticeable as you increase the shutter speed, until the entire image becomes black due to the shutter opening and closing before the flash has even triggered.
My Splash Photography Setup
For this tutorial shoot I’m using a single light source, double diffused: first through a softbox, and then through a large sheet of scrim, which also doubles as my backdrop. By placing my light directly behind the subject, the flash will travel through the liquid droplets, capturing all the detail, but without risk of unwanted reflections.
- Pixapro 120cm Octagonal softbox with single diffusion
- 5 foot x 7 foot scrim
- Plexiglas for glass to stand on
- Sony A7iii with Sony Zeiss 90mm f/2.8 Macro Lens
- Pixapro “Pika 200TTL”
- Flash power of 1/32 -3 – gives an equivalent T.1 shutter speed of 1/8474
Related: Want A Peek Inside My Food Photography Gear Collection?
Understanding Flash Duration
OK, so we’ve established that we need to use flash in order to freeze the motion of the splash. But although the flash of a strobe may look incredibly short to the naked eye, in reality some flash durations are much shorter than others. Indeed, the minimum duration that a strobe can achieve varies massively from one model to another.
Fortunately, whatever its fastest output may be, most strobes will allow you to adjust their speed manually by dropping the power output: effectively the reduction in power means that the strobe can reach peak-output much more quickly, resulting in a shorter flash duration. Exactly what we want for freezing the action.
The duration of a flash is usually indicated by a T.1 rating. Each different model of speed light or studio strobe will offer a particular T.1 speed at different levels of output, so you’ll need to look up the appropriate flash power rating for your particular model.
What’s the Difference Between a T.1 and T.5 Flash Duration Rating?
When you go to look up the T.1 speed of your flash you may well come across a T.5. rating instead. Is this the same thing as T.1?
No, in fact T.5 ratings are completely misleading and do not truly represent the duration of flash your unit will be capable of achieving. A T.1 rating indicates the amount of time it takes the strobe to go from zero output to 100% and then back to almost zero again. That’s a useful measurement to know. Meanwhile a T.5 rating doesn’t measure the entire arc of the flash’s output, but instead only times the unit until power has dropped down to 50%.
But 50% of, say, 70Ws is still a lot of light: certainly enough to be picked up by your camera’s image sensor. What’s more, if you look at typical flash output, you’ll see that the trajectory from zero to 100% is relatively very short, whereas there is a much longer “tail” as the output dies down again more slowly.
But if it takes a while for your strobe to drop from 50% power to zero, in the meantime this will be creating a blurred “ghost” exposure of anything moving within the frame. In reality then, T.5 ratings serve no practical purpose whatsoever.
For a more in-depth explanation of flash duration, this article is very “illuminating.”
Splash Photography ISO Settings
As the way to achieve a faster flash duration on your strobe is effectively just to select a lower power output, you may find that you need to crank up the ISO on your camera in order to achieve a sufficiently deep depth of field. Check what’s the highest ISO setting your camera can get away with before it begins producing unacceptable levels of digital noise, as this can vary considerably between cameras. And there would be little point of going to the trouble of shooting a stunning splash shot if the final image is unusably pixelated and grainy.
Remember, though, that changing to a lower shutter speed will make no difference to your exposure when using flash as your sole light source. All this would do is risk allowing ambient light to interfere with your shot, thus potentially causing unwanted blur. Meanwhile, you need your strobe to be set on a low power setting in order to profit from the short flash duration. So if you do find that you need more light, a higher ISO is the only solution.
Capturing the Action
Clearly droplets from a splash travel at such a fast speed that even the most rapid-reflexed photographer would struggle to capture the “decisive moment” with their naked eye. Luckily though, beyond the faster flash duration, another advantage of shooting with your strobe at a lower power setting is that it will recycle much faster. This means that you can work with your camera set to burst-shooting mode so as to capture a rapid succession of images from which to choose the best moments.
Just be sure to shoot on a tripod from a fixed position. This way, once you’re done shooting, you can use Photoshop to composite together your favourite splashes into a single image using layer masks.
Related: Why You Should Be Using A Tripod For Food Photography
These are the 3 shots I ended up using for my final image

And here’s the final shot!

Final Thoughts
Hopefully you’ve found this splash photography tutorial useful. As we’ve just seen, capturing food photography splash effects isn’t so difficult once you know how. In actual fact a splash photography setup can be relatively simple, as in my example here using just one light. What’s important is that you use the right settings on your camera and flash so as to truly freeze the action.
Thanks for sharing! It’s so hard to find any tutorials on splash photography. It’s something I definitely want to experiment more with.
Great tutorial Lauren! I have a Profoto B1X and never thought to look up how to get 1/8000 sec but it has a “freeze” setting and the manual has a graph so you can determine what the equivalent SS setting is for each power setting. So excited to try this!
Can’t wait to see your results!
Hi Lauren Was just telling my mom that splashes are the next thing I’d like to master and there you were with a new video for me!! Just watched the video twice!! Fantastic as always. Jam packed with everything need to know. I also read the blog post. A few questions for you. 1. What is the advantage of shooting on a plexiglass surface? Could you shoot on a regular photo board surface? 2. I have the Canon 600EX speedlight. I could not find the T1 rating for this flash. I tried googling T1 rating for canon 600ex speedlight but… Read more »
Hi Cindy! How funny! You can absolutely use whatever backdrop you like! I just like the effect of plexiglass for the reflection but it’s totally optional. I just downloaded the manual for your flash and I don’t see it in there either – I’d suggest pinging a quick email off to Canon and asking them for the T.1 ratings for this flash!
Thanks for the speedy reply Lauren. I will contact Canon to get the info.
Hope they’re able to help you!